3 tips to create orders in record time
07 Feb 2020
4 min read
We all wish we had more time. So we’re all looking for ingenious ways to save time. Let Google search “save time” and you will receive about 5,040,000,000 results. Tips to save time in the morning, how to manage your mailbox and how to get through the working day more efficiently. Luckily, quick wins can often be realized with small steps. To help you with this, we listed some tips with which you can enter transport (TMS) orders in no time.
Getting more work done in less time is not necessarily achieved by working hard. But especially by working smarter and automating repetitive tasks.
For repetitive orders, it is possible to predefine certain things to minimize the time (and errors). In this blog we cover three different ways:
1. Copy one or more existing orders
2. Set up a function set on the customer card.
3. Get started with templates.
Copy one or more orders
First, there is the option to copy an existing order. Search for the relevant document. Navigate to “Actions”, click on “Functions” and select “Copy document…”.
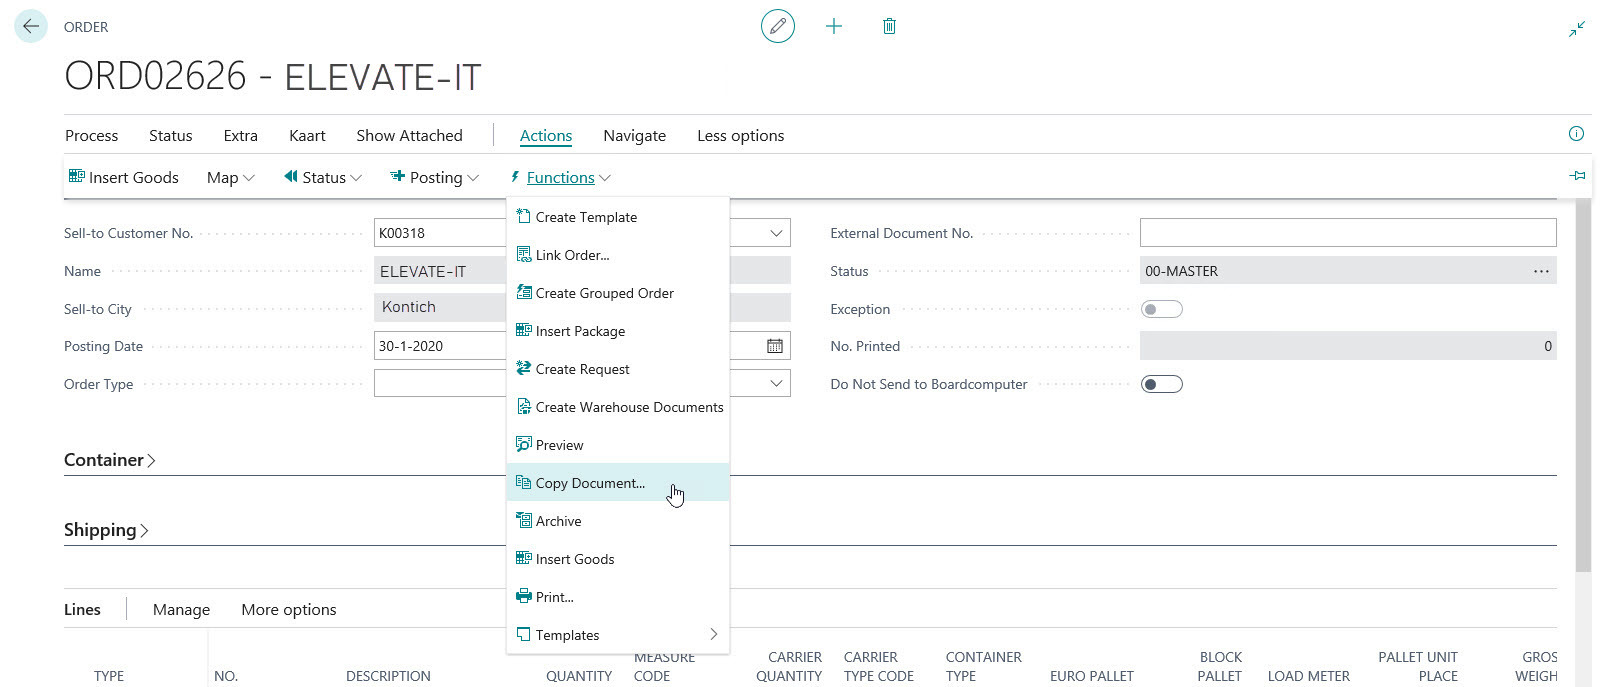
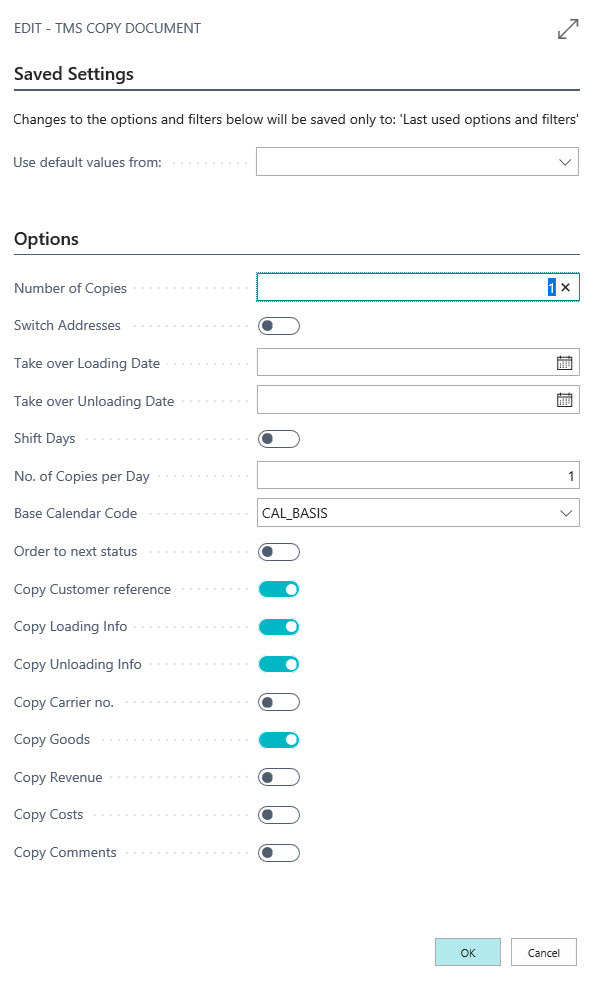
Then choose which value fields you want to copy to the new order and click on “OK”. The new order will now be created.
TIP: You can immediately copy multiple orders on successive dates, for example for orders that are driven daily for the same customer.
Set up a function set on the customer card
Another way to partially fill an order is by using a function set. This may seem difficult at first glance, but once it is set up, it will save a lot of time in the long run. In the example, we have the order type automatically filled with Groupage.
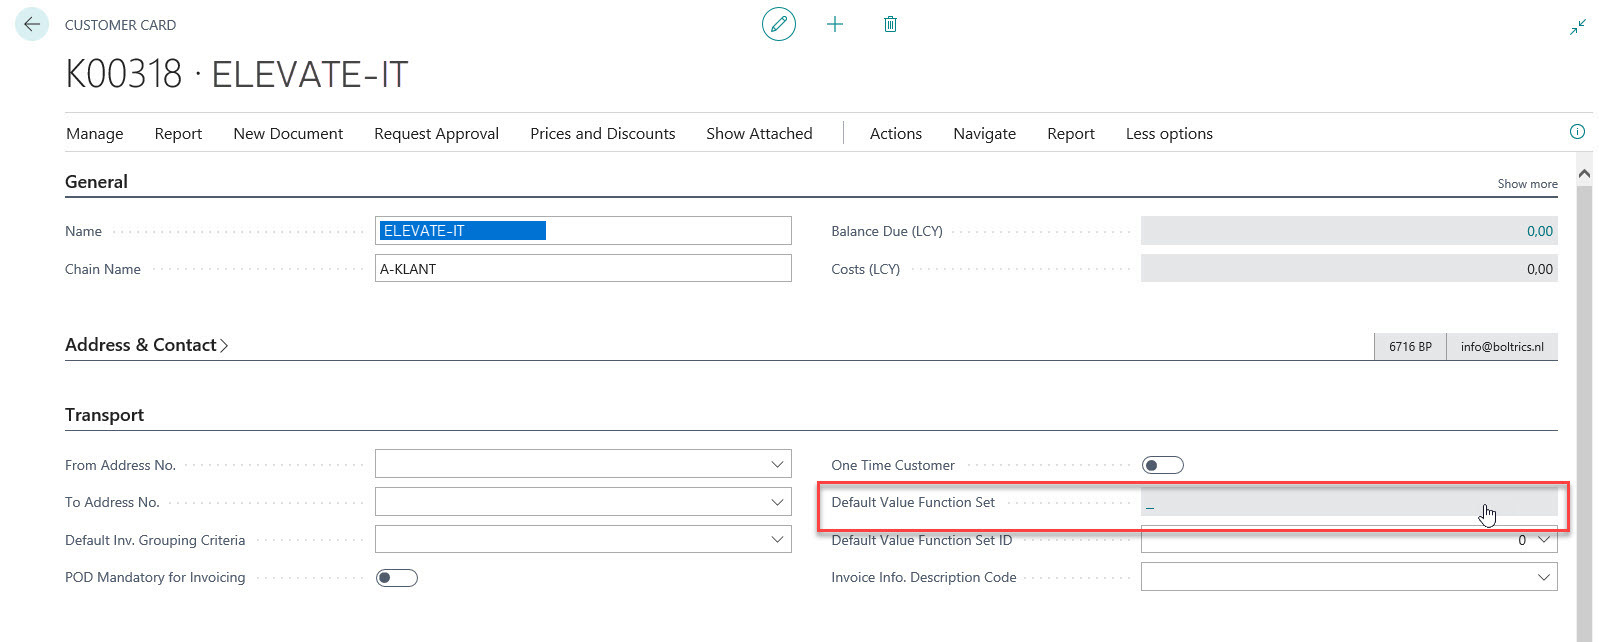
Setting up the function set starts with looking up the relevant customer card. In our example, we are going to set the order type for customer ELEVATE-IT.
In the Transport tab, navigate to “Default Value Function Set” as shown below.
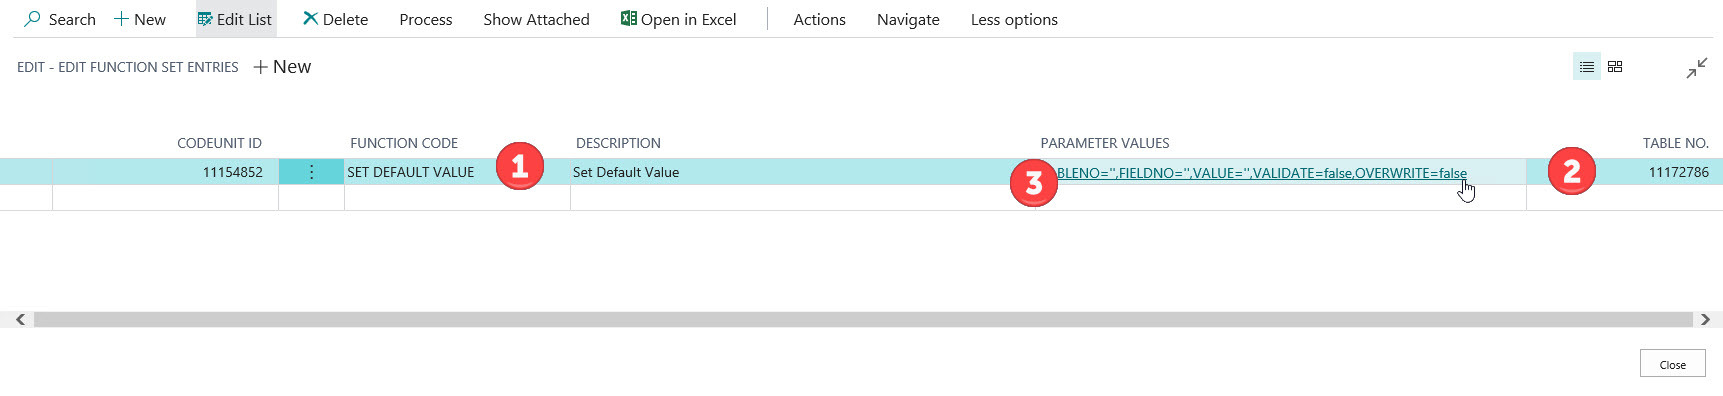
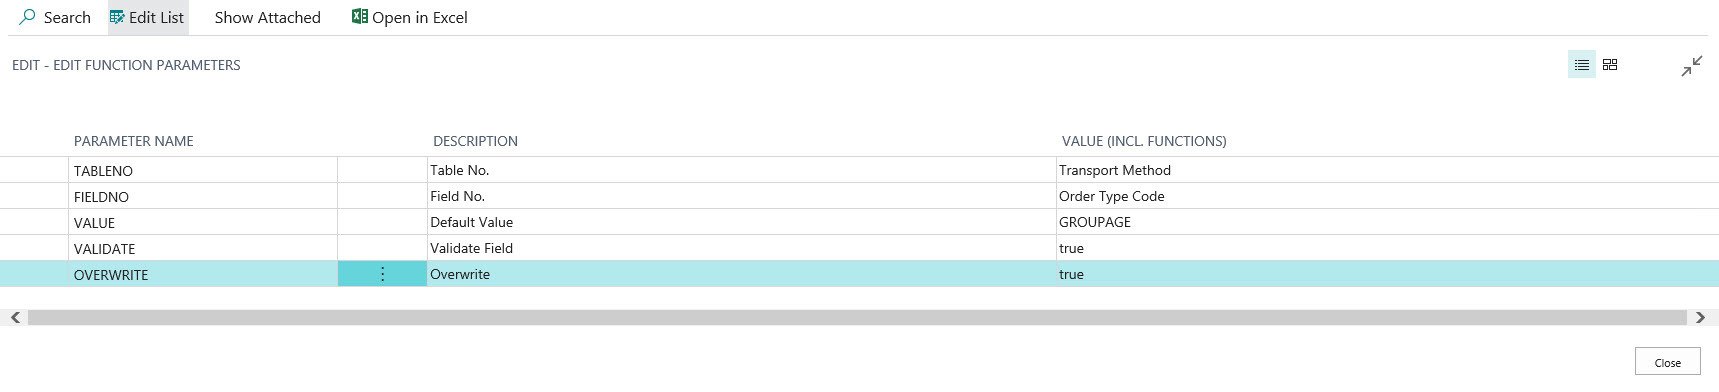
1. Skip column code unit ID and enter “SET DEFAULT VALUE” in a new line in column “Function code”. The code unit ID is filled automatically.
2. Adjust table number to 11172786 = TMS document header
3. Adjust the parameter values by clicking on this field.
Next step: select the correct parameters. You do this by navigating through the dots to the correct values or by typing them in.
Put together the right filter. In this example, we work with a groupage order.
1. At TABLE NO, select the document header again.
2. At FIELD NO, select the order type (in this example, we define the order type).
3. The VALUE is based on the standard GROUPAGE value.
4. At VALIDATE, enter “true” to validate this value in the relevant table.
5. And true/false with OVERWRITE if a certain default value must be overwritten.
Note: Are there already values available? Then these are overwritten if you choose True. In this example, we work with a new document and this field is empty. So setting it to “TRUE” will have no further consequences.
Close this screen and go back to the customer card. Here you will see that the default function set is filled:

The function set is now also visible on the customer card.
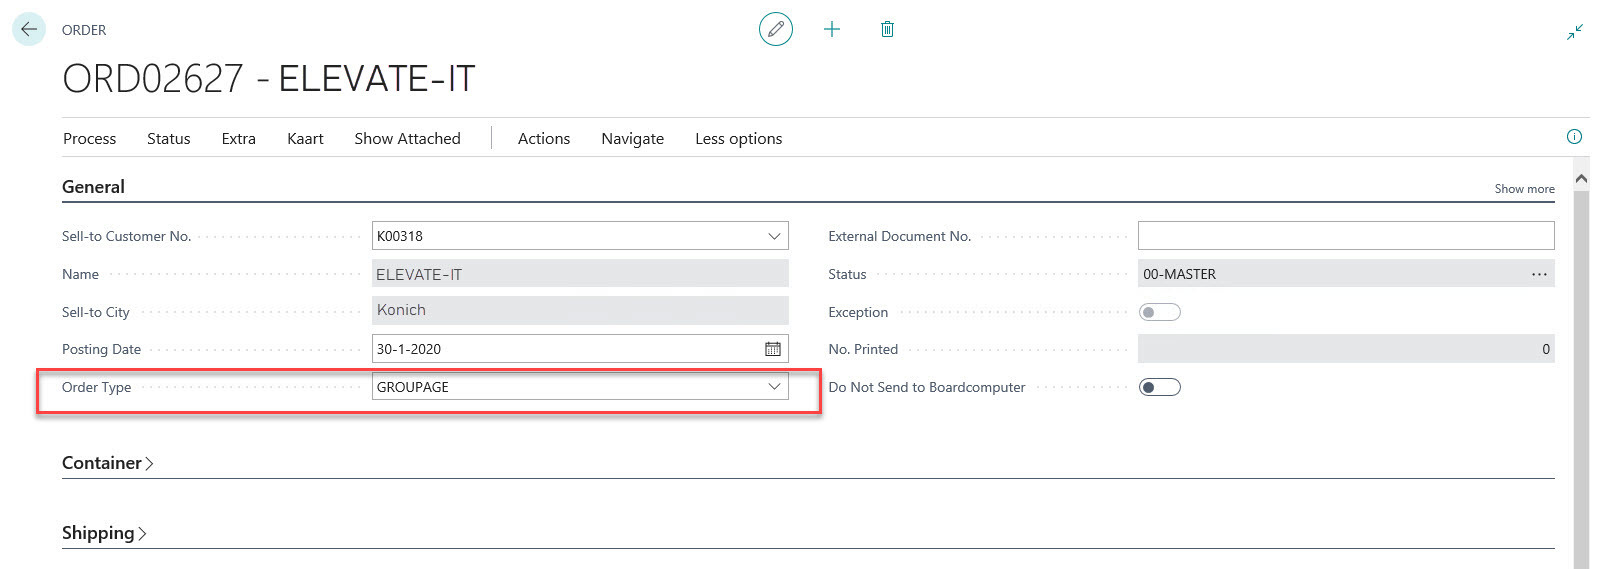
From now on, when a new order is created for the relevant customer, the order type will automatically be filled with GROUPAGE:
In this example, we have worked with an order type. By adding the function multiple times on another field, other fields can also be filled in advance.
Note: This functionality only works on the header of the transport document. To also set defaults in the rules, it is better to use the copy function or the following option.
Get started with templates
Finally, it is possible to use a template. It is possible to build this from an existing order. With comes in handy when comparable orders come back often.
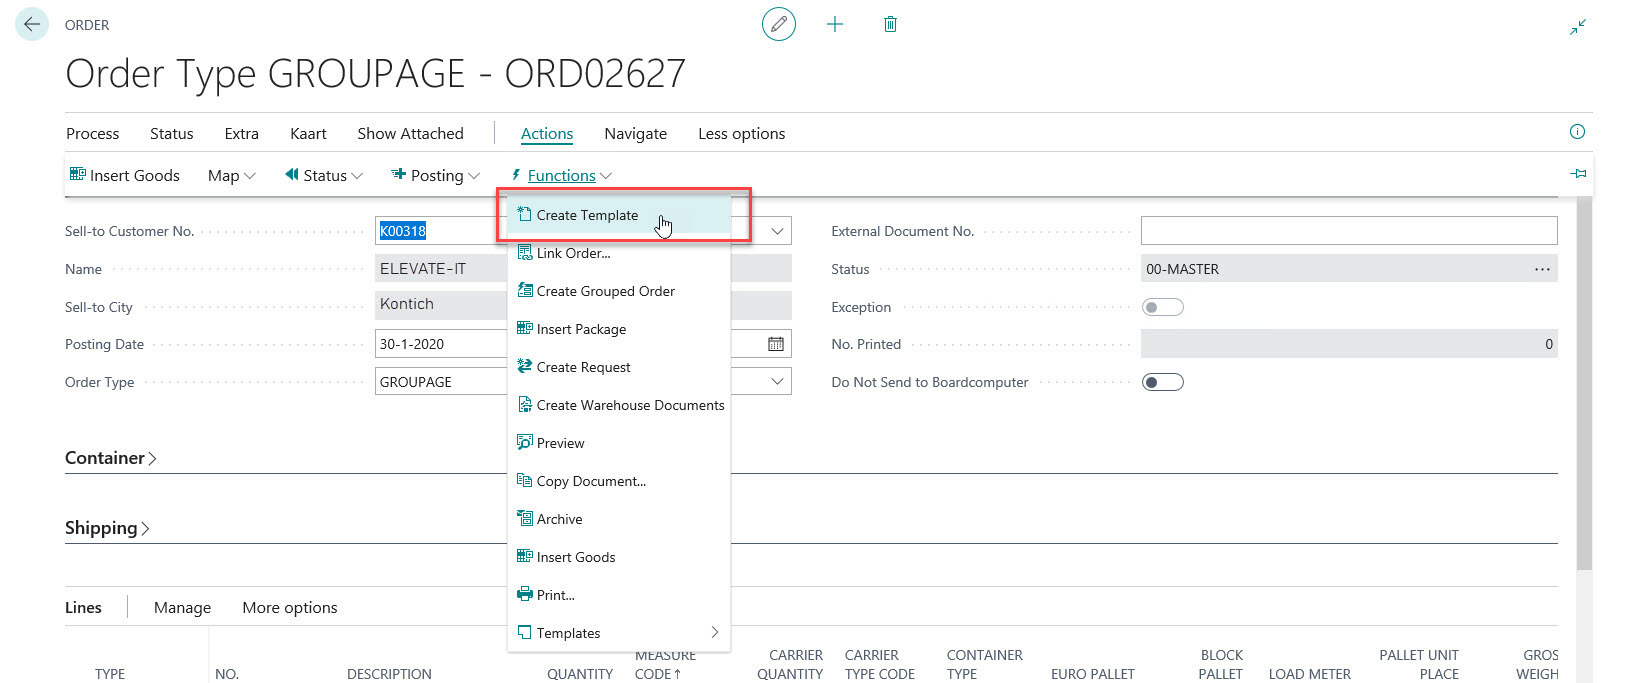
Choose an existing order and go to “Create template” via “Actions” -> “Functions”.
Give the new template a name in the description column and adjust the other columns as desired. You can experiment with this by, for example, only filling in a shipping address or order type or leaving it blank.
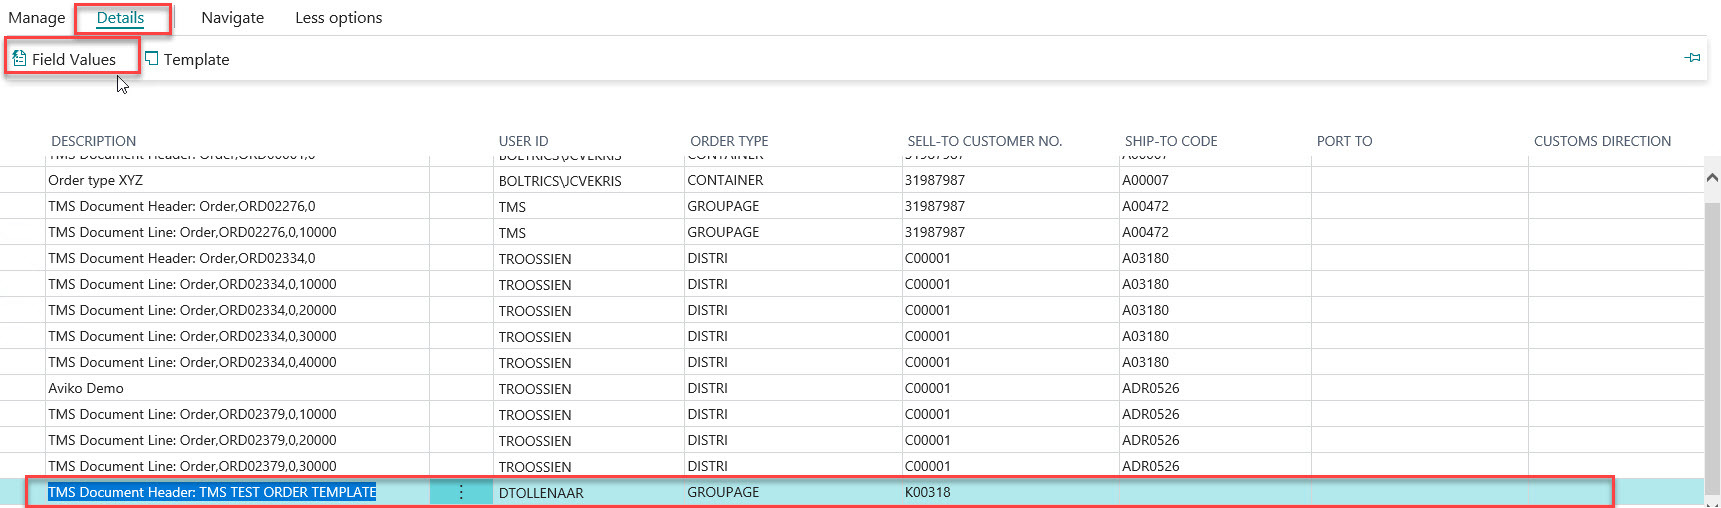
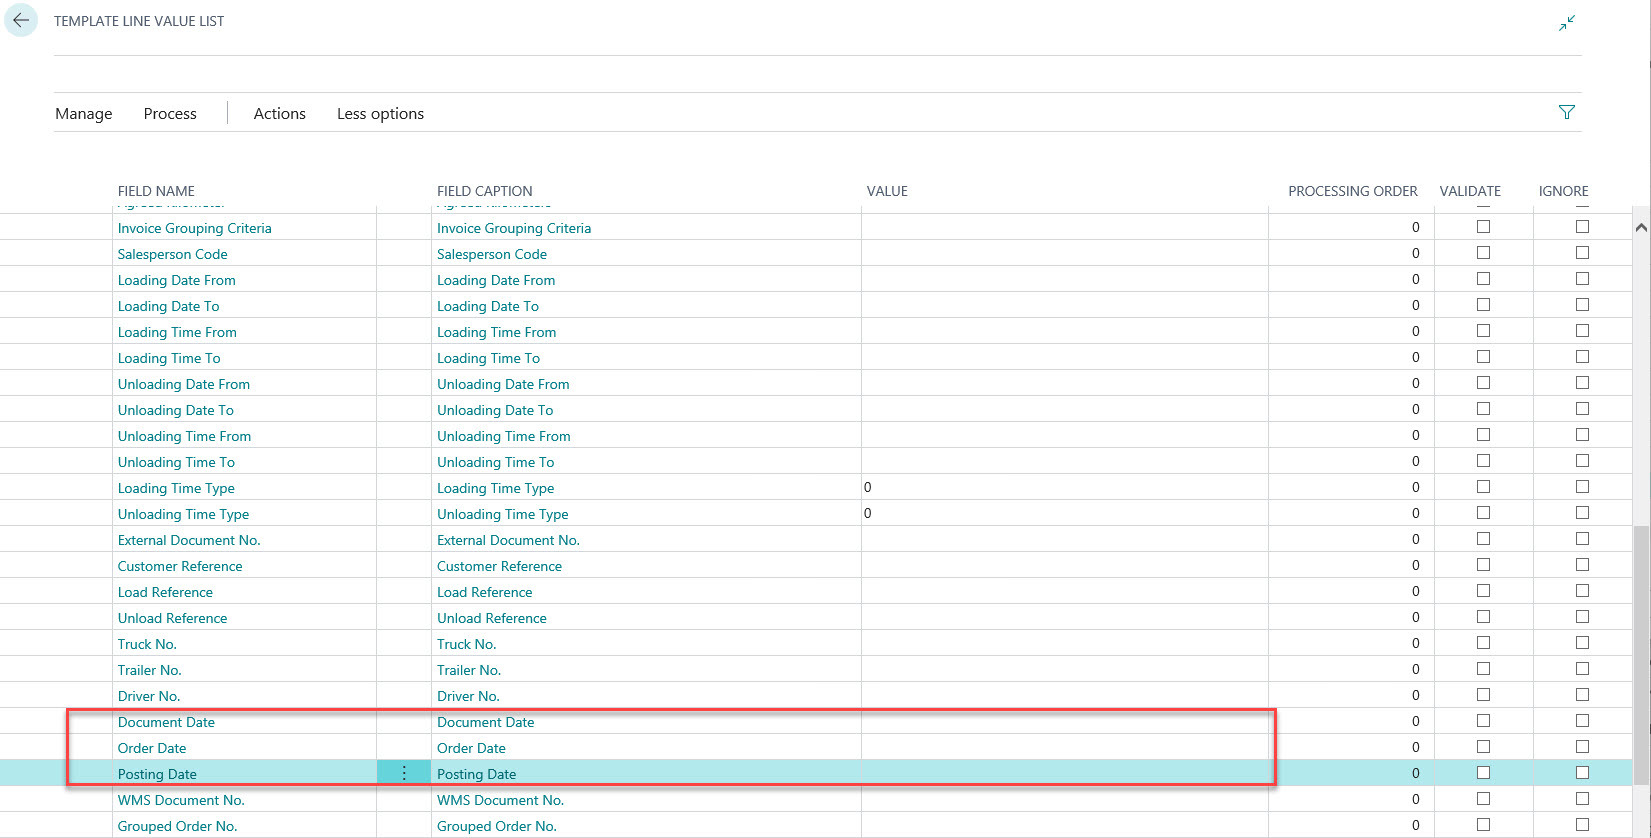
Via “Details” -> “Field values” there is the possibility to further adjust the template. To prevent the same date being used, you can, for example, clear the date fields or set certain fields to a default value.
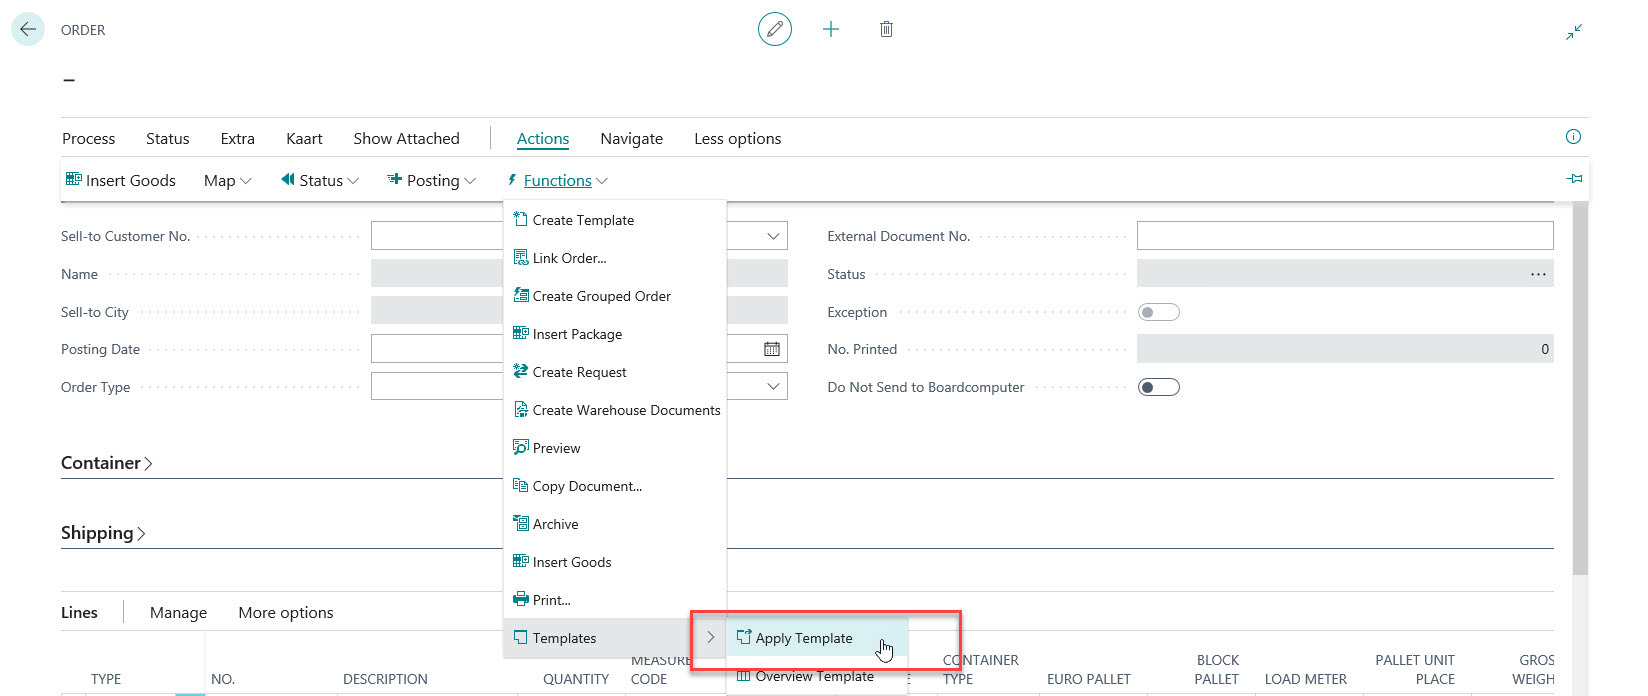
When you now create a new order, you can use “Actions” -> “Functions” -> “Templates” to “Apply template” to use the newly created template for your new order.
Got the hang of it? Check out our other how to blog posts and simplify your work.